June 30, 2013

Canvas Wrapping Paper Art - Easiest ever!


I was on a roll this past spring updating all of our bedrooms.  It started with my master bedroom, then Little Brother got a "big boy" room.  "Sis" (as he refers to her) was feeling a little left out so I ended up making some changes to her room as well.  I will post all of the room reveals soon.

One of my favorite things in Sis's room is her new corner headboard (you can see a sneak peek of it above).  The fabric is so busy that I was stumped as to what to do over the bed.  My original plan was to do a gallery wall similar to what she had in her room before.


But with this fabric....


It was just too much!

I needed to come up with something that fit Sis's personality (bright, fun, sweet), but was calming enough to balance the crazy fabric headboard.

While I was shopping for her birthday party supplies at Target, I stumbled across a super fun rainbow/water color wrapping paper.  I bought it to wrap her birthday presents because it was so "her".  
When I got home, I realized that the wrapping paper had all of the same bright colors as her headboard fabric.  I had an idea!  As I often shift gears in the middle of doing something, I stopped wrapping her presents and headed to my craft stash where I had a four pack of canvases that I bought on sale at Hobby Lobby.

I laid all four canvases together on the floor creating one large canvas.  Next, I rolled out my paper large enough to fill the entire area.


I decided that I would cut out a giant heart because it was the easiest thing I could think of.  I folded the paper in half and reverted back to elementary school Valentine's Day card making days.


After adhering the heart to the canvas with spray adhesive, I used an Exacto knife to cut through the heart using the canvas edges as a guide.

(Hello veins - yikes!!)


This created four separate canvases once again.  I liked where this was going, but it still needed something.  I taped off a 1/2 inch border and painted a navy blue frame around the edge including the sides of the canvases.

A couple coats of Modge Podge and here it is again... 


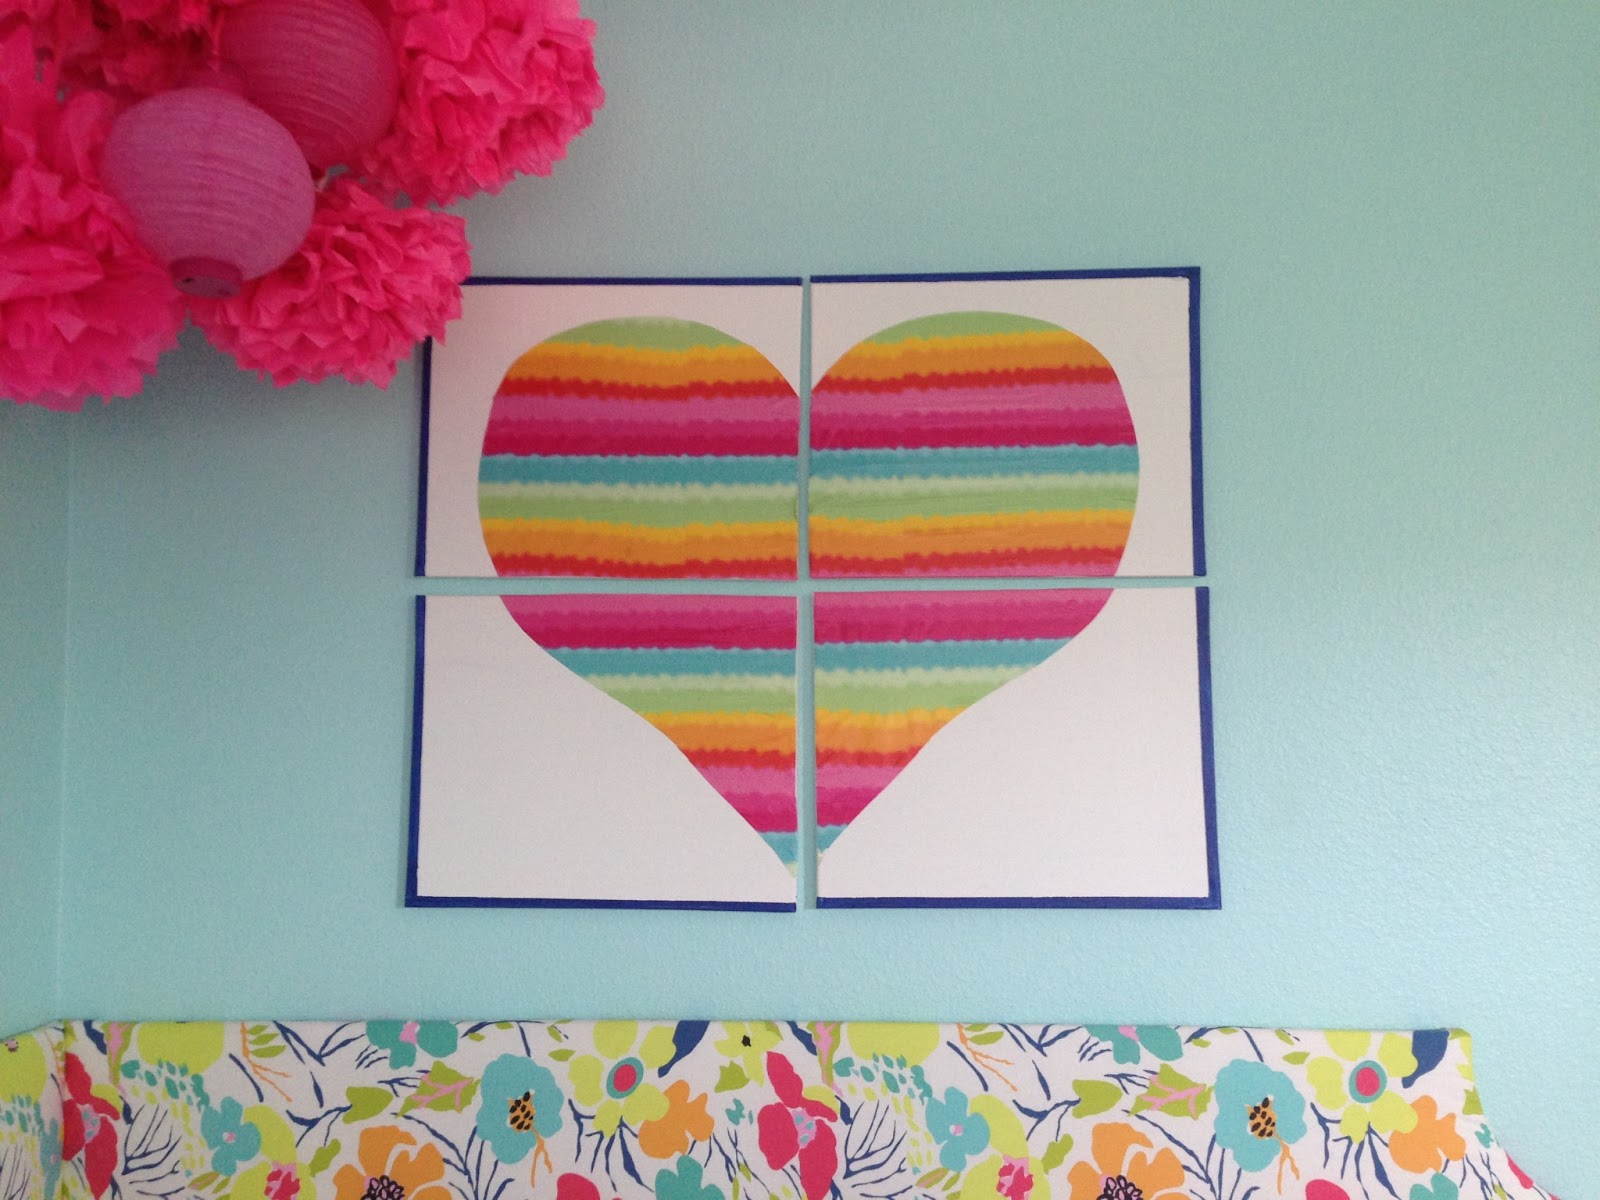
I love the way it coordinates with the fabric, but isn't too fussy.  It is also bright, fun and sweet just like Sis!

Other than waiting for the Modge Podge to dry, the whole process only took about 30 minutes and cost less than $15.  

Cheap and easy (insert joke here) - my favorite kind of project!


June 20, 2013

Designing from a Distance -Ohio Remodel


It was about this time last year when we received a call from a young guy in Austin who needed help renovating an investment property.  Budget was very important since the house would be resold after the renovations were completed.  We talked in detail about what the project entailed and decided that we were a good fit for one another.  It sounded like a great opportunity and I was super excited about the challenge ahead.

There was one catch....the property was in Ohio.  

The entire project was done over the phone or by email.  Internet consultations for one room are very common these days, but the whole house is a different story.  The client sent me photos of the home along with a floor plan.  It was like piecing a puzzle together as I tried to make sense of the photos that he sent me.  

Here is all I had to work with.


The client and I only had one face to face meeting.  He was probably the easiest person I have ever worked with!  He was completely open to all of my suggestions and pretty much gave me free reign on the design plan.  

Once I (I mean we...) decided on a direction, I went to work on selecting the actual materials that we would use.  The plan was to brighten things up with bright white trim, nice cool colors along with chrome and stainless accents.   

Here are a few inspiration boards that I sent to the client to communicate my vision.

 Kitchen

Entry

Guest Bath

Through out the renovation process, I only got a few sneak peeks of the progress.  The client would send pictures occasionally which only left me wanting to see more!  I finally got to see the final outcome a few weeks ago when he sent me the photos from the real estate listing.

Here is how the home looks now....


It is really like a breath of fresh air!  I am so happy with the outcome and more importantly, so is the client and the new homeowner.  The home sold in 1 day!!!  

The client is back in Austin and has recently purchased another property (in Austin this time).   He has asked for my help once again.  I can't wait to get started!