Showing posts with label DIY Projects. Show all posts

June 30, 2013

Canvas Wrapping Paper Art - Easiest ever!


I was on a roll this past spring updating all of our bedrooms.  It started with my master bedroom, then Little Brother got a "big boy" room.  "Sis" (as he refers to her) was feeling a little left out so I ended up making some changes to her room as well.  I will post all of the room reveals soon.

One of my favorite things in Sis's room is her new corner headboard (you can see a sneak peek of it above).  The fabric is so busy that I was stumped as to what to do over the bed.  My original plan was to do a gallery wall similar to what she had in her room before.


But with this fabric....


It was just too much!

I needed to come up with something that fit Sis's personality (bright, fun, sweet), but was calming enough to balance the crazy fabric headboard.

While I was shopping for her birthday party supplies at Target, I stumbled across a super fun rainbow/water color wrapping paper.  I bought it to wrap her birthday presents because it was so "her".  
When I got home, I realized that the wrapping paper had all of the same bright colors as her headboard fabric.  I had an idea!  As I often shift gears in the middle of doing something, I stopped wrapping her presents and headed to my craft stash where I had a four pack of canvases that I bought on sale at Hobby Lobby.

I laid all four canvases together on the floor creating one large canvas.  Next, I rolled out my paper large enough to fill the entire area.


I decided that I would cut out a giant heart because it was the easiest thing I could think of.  I folded the paper in half and reverted back to elementary school Valentine's Day card making days.


After adhering the heart to the canvas with spray adhesive, I used an Exacto knife to cut through the heart using the canvas edges as a guide.

(Hello veins - yikes!!)


This created four separate canvases once again.  I liked where this was going, but it still needed something.  I taped off a 1/2 inch border and painted a navy blue frame around the edge including the sides of the canvases.

A couple coats of Modge Podge and here it is again... 


I love the way it coordinates with the fabric, but isn't too fussy.  It is also bright, fun and sweet just like Sis!

Other than waiting for the Modge Podge to dry, the whole process only took about 30 minutes and cost less than $15.  

Cheap and easy (insert joke here) - my favorite kind of project!


May 20, 2013

DIY Iron On Party Favors

I am just now recovering from my sweet girl's second slumber party celebrating her 8th birthday.  After weeks of bouncing around party ideas, she decided that she wanted to have a glow in the dark/neon/bowling/sleepover.  How can you top that?  It turned out to be a really easy (for me) and fun (for her) party.  

We kicked off the par-tay at 6:00 p.m.  As the girls arrived, they snacked on these AWESOME cookies that my talented neighbor, Megan Lee made.  And yes, they taste as good as they look. 


Once all of the girls were here, Brooke passed out the party favors. 


Each girl's bag was filled with glow bracelets, glow necklaces and these personalized neon bowling shirts.  


Creating custom party favors and gifts is SO easy.  You can find iron on transfer paper at most craft stores.  I bought mine at Hobby Lobby.   I created my image using clip art on PowerPoint.  I am sure  there are probably better programs out there, but I am comfortable with PowerPoint.  

Once I was happy with the image, I duplicated it for each girl and simply changed the name.  I printed 2 images per sheet to make the most of the 5 sheets that came in the package.  Next, I cut out the designs and simply ironed them onto the shirts.

Here are the girls (and little brother) sporting their matching shirts at the bowling alley.

And here is how they looked under the black lights.


So fun!!

This isn't my first time to create party favors using iron on transfer paper.  

A couple of years ago (seems like yesterday), I made these aprons for the girl's to wear while making pancakes at our pancakes and pajamas party.

I ordered the aprons from Discount School Supply.  Again, I used PowerPoint, printed them out and ironed them on.  


Oh, I almost forgot about last year's sleepover.  I made each girl their own autograph pillowcase.  I literally just ran upstairs and grabbed this one out of the linen closet.  That is why it is a wrinkled mess.  The girls passed the pillowcases around and signed each others with fabric markers. 


I hope the girls liked the favors as much as I do.  Who knows what we will come up with for next year.


February 26, 2011

French Burlap Ottoman - Oui! Oui!


I have been admiring  the burlap and linen furniture from Restoration Hardware for a while now. I love the texture and simplicity of it all.  In the past couple of years, French grain and flour sacks have emerged as a design trend in home decor.  I would love to show you some of my faves and my inspiration, but I haven't figured out how to post someone else's pictures yet.  (Rookie blogger...jeez!)  I can however show you a quick link....if you promise to come back.  Check these out.  Aren't they great? 

Recently, I was sucked into the blog world reading a few blogs when I came across the genius at Flea Market Trixie. I love her romantic and shabby chic style.  The reason I say she is a genius is that she actually teaches you how to print your own customized "grain sack"!  
 
When I saw her fabulous idea, I knew I needed to do this and I knew exactly where I would do it!  The same cat that clawed the Parsons chair that I re-upholstered in an earlier post, also clawed the cocktail ottoman in my living room. It's a little hard to see in the photo, but all four corners have been mangled.  I have patched the dang thing about 20 times.

Following Flea Market Trixie's instructions, here is my cocktail ottoman now!
 

Here is how I did it:
  1. I figured out what I wanted my "grain sack" to say.
  2. Translated it into French here.   
  3. Chose my fonts and clip art and created my design in Power Point. 
  4. Printed the design (making sure to reverse the design in a mirror image) onto iron on transfer sheets that I purchased at Michael's for $9.99 for 6 sheets.
  5. Cut out each word and picture individually.
  6. Layed out my design on the fabric which is a remnant I bought at the fabric store for only $7.50 for a yard and a half.  (It is a very tightly woven linen type fabric that has the same rustic look as burlap, but is much softer and might actually stand a chance against my damn cat).
  7. I ironed on the words and pictures being sure to remove them while the sheets were still hot to maintain a matte finish.  I also pulled them off before they were actually "ready" so that the design would look old and worn.


The English translation is:
"Where the heart is." (Not visible in photo)
Pesses (our last name) Castle
"Our home is filled with love and laughter."
The number and line below is our address
     
     8.  Next, I sewed each of the four corners for the bottom part of the ottoman.
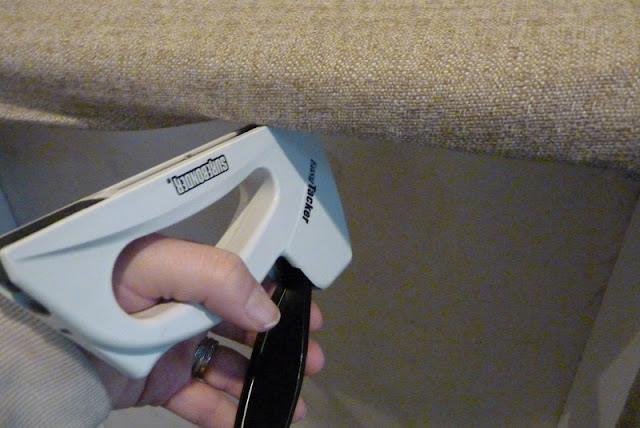
     9.  Used my second favorite tool (only to my hot glue gun) to staple the inside and bottom of the fabric.
      10.  Finally, I finished off the look with nail heads ($8 for 4 packs) and hot glued on the gimp trim ($14).


Here is the before and after:
Before
After

I  was a little worried about the durability of such a light colored fabric with two little ones in the house.  Since finishing this project a week ago it has already endured a coffee spill and a juice box explosion (thanks to my busy toddler...my coffee, not his btw).  I am happy to report that it cleaned up great.  Not a stain in sight!  The next test....the damn cat.

If it does get destroyed or I grow tired of it, I can change it easily and inexpensively.  The whole project only cost about $40!

One little side note - I was so excited to finally use my zebra pillows.  They have made an appearance in almost every room of my house at one time or another only to end up back in the closet.  I couldn't exactly pair them with the leopard ottoman or my living room would look a little too "African Safari" for my taste.  I think they work great with my new ottoman!


February 06, 2011

Adventures in Decorating {Stair Remodel}

Sometimes my DIY mentality knows no limits.  I tend to think that I (my brains and my husbands free labor) can do anything when it comes to home renovations.  My husband doesn't always share my "vision"....or my naive optimism that we can do it ourselves!!  
Since we moved into our house 4 1/2 years ago, I have always despised the stair railing.  It gives me major apartment flashbacks.   Instead of asking for jewelry or handbags for my birthday or Christmas, I always ask for things for the house.  This particular project has been on my wish list for the past 4 years.  My husband even gave me a "coupon" for it to be done TWICE!!  The estimates came back over $1,000 and we just couldn't justify the cost.  (My husband also shares my thrifty nature.)

Over the Christmas break, I convinced my husband once and for all that we COULD do it ourselves!  Our friend, Corona Light Josh helped me persuade him. Like any tipsy confident DIY'ers, we went to work immediately!  Who cares that it was 9:00 p.m.???

 (This DIY project brought to by Corona Light)

Once the demolition began, there was no turning back.  All part of my plan....muwahahaha!!!

Here is the quick synopsis of how the project unfolded:


Finally, after tons of dust and debris, a few miscalculations here and there and thousands of trips to Home Depot, it was done!  

Drum roll please.........................

Yay!!  I knew we could do it!!   I never doubted my hubby's skills for a minute.  
(All though the guys at Home Depot might have.  They actually laughed at us for attempting a stair remodel and asked us to film the project and put it on YouTube!  I'm not even kidding.)
 
Eat it Home Depot guys! Just kidding...
I still need to touch up the trim, but I couldn't wait to post!  Again, here it is.....
The whole project only cost us around $350!! 

Just in case you were wondering.  The other side of the stairs actually opens up to our home office.  Our plans were to hire someone to close it in and add French doors.  Now that I know my husband has mad skills....we will be attempting it ourselves.  Valentine's Day IS right around the corner.  "Oh, Sweetheart..........."

January 22, 2011

Parsons Chair Re-Upholstery

I have always wanted to learn how to re-upholster furniture.  Just think of the possibilities!! Every once in a while, I consider signing up for an upholstery class at the community college in town, but I have never actually gone through with it.

Recently, I was working on the revamp of my home "studio/office" (reveal coming soon) and this old, ratty chair was begging me for some lovin'.  My original plan was to buy a ready made slip cover to hide the cat scratches. 
I don't know how to explain it, but something just made me stop what I was doing and investigate how this thing was put together.  I started tugging at the backing and pulling off piece after piece!  I kept thinking to myself, "oh crap, what have I done?"!  The next thing I knew, the chair was bare.  The good news was that I now had an idea of how it was constructed and I was confident that I could breathe new life into it in no time.      


I went to work cutting and pinning fabric.  I whipped out my sewing machine to sew what I needed to.  I am not much of a seamstress, but I can manage a few straight seams here and there. 

I am pleased as punch (yeah, I said "pleased as punch", what???) with the outcome!
I did have to improvise by adding the blue banding and nail head trim to cover where the skirt attaches, but that's okay!  I actually like how the blue ties into the rest of the room and it gives it a modern twist.   

It's safe to say that there will be more re-upholstery attempts in my future! You never know what you can do until you try:)

January 21, 2011

A Creative Space for a Budding Artist


Anyone who knows me, knows that I love re-sale shops, consignment stores, and of course, the Grandaddy of them all.....Goodwill! Thank goodness being "green" is so in these days. It's much cooler to buy second hand because you care about the environment and not just because you are cheap. I have become quite the "environmentalist".

It seems that I am always on a mission for something. This time, I was on a mission to find items for a kids craft area in my newly revamped home "studio" (reveal coming soon).


One quick trip to Goodwill and mission accomplished!! Chair, tray and buckets for around eleven bucks! The little cutie on the right was a bargain too!

Some primer and a couple cans of spray paint later and Big Sister has the perfect place to create masterpiece after masterpiece without being disturbed by Baby Brother.


The table top is a piece of Silestone from an old kitchen island. It has been leaning up against a wall in our garage for about 4 years. I am so glad to find a good use for it. I found the sturdy base (previously a hideous end table) at, you guessed it.......Goodwill for $10.99!

I have been trying for months to come up with a way to showcase my daughter's artwork. She is quite the "arteest". She creates what seems like thousands of precious works of art a day! Finding display space has become a challenge to say the least. There is only so much room on the refrigerator door.


One day at Home Depot I came across these inexpensive pre-cut boards (only $1.45 each). Add close-pins, paint, embellish and voila!


The perfect showcase for her latest creations! Big Sister LOVES her new "studio". Unfortunately for her, Baby Brother does too. He sneaks in every chance he gets. At 14 months, he is not into creating as much as destructing!
The whole project only cost about $35 dollars including paint (and look at all the trees I saved:).